PART 2.
THE ONE ROUTINE OF HEALTHY
NO-RECIPE COOKING

There are six steps in the Kitchen Karate routine:
1. Pick. Pick your ingredients
2. Plan. Plan your meal
3. Prep. Prep your ingredients
4. Season. Season your ingredients
5. Cook. Cook your ingredients
6. Serve. Serve your meal
These six steps are the recipe behind the recipes, the secret code hiding in plain sight, the thing that no one ever thought to tell them before.
Now, anyone who learned to cook at their parent’s hip may see these six steps as smack-your-head-duh obvious.
But to recipe-followers they are a revelation. In my classes, when I get to this point, I literally hear an “aha” sweep through the room.
At its heart no-recipe cooking really is as simple as grabbing some ingredients, chopping them up, sprinkling on some seasonings, cooking it down, eating and liking it.
Notice how planning your meal comes after picking your ingredients? This is the key to keeping the whole process easy-breezy as we’ll soon explore.
Let's take a closer look at each step in detail.
“In my classes, when I get to this point, I literally hear an “aha” sweep through the room.”
STEP 1. PICK
Your only task when selecting ingredients for your meal is to fill out your template.

The actions needed to complete this step are simple:
1. Select one specific ingredient to fill each part of your meal template
2. Place them all on your kitchen counter
Done.
In the INGREDIENT PICKING SKILLS SECTION of this guide we do a deep dive on:
● the thought process behind which ingredients to pick
● how to size up the right amount of each ingredient needed.
STEP 2. PLAN

Now it’s time to plan your meal. And the good news is that all the big decisions have already been made! You’ve already picked out specific ingredients to fill your meal template.
You have two decision left to make:
1. Choose your meal format
2. Choose your seasoning strategy
And one action to take:
1. Grab your fresh seasonings
Your two decisions:
Choose your meal format. This is when you decide what kind of meal you are making. Are you going à la carte, making a stir fry, tossing a pasta, blending up a puree, rolling a wrap, or what?
Choose your seasoning strategy. This is the flavor profile of your meal. Are you going Mexican, Italian, Indian, Thai, or just sticking to the basics.
In the MEAL PLANNING SKILLS SECTION of this guide we cover:
● How to choose the right meal format
● How to choose the right seasoning strategy
One action: Grab your fresh seasonings.
Now that you have your ingredients out and have an idea for how you want to season them, you need to grab the fresh seasonings that support your seasoning strategy.
Fresh seasonings are bought each week and generally need to get prepped before you can use them (ie. onion, garlic,citrus, fresh herbs) in contrast to your pantry items that can be stored over time (ie. salt, pepper, spices, vinegars).
In other words, the only things you need to take out of this step are those items that you’ll need to take a knife to during the next step PREP. This will almost always include onion and garlic. But it might include such things as lemon, lime, orange, jalapeno, or fresh herbs like cilantro, basil, mint, dill, oregano, thyme,parsley, etc.
STEP 3. PREP

At this point you have your meal plan together with all the fresh ingredients out and on the counter. Now it’s time to put on your prep cook’s hat and execute your plan.
There are several steps to prepping your ingredients:
1. Set up your prep station
2. Preheat oven to 400°f / 205°c (if planning to roast anything)
3. Start cooking grains (if including grains)
4. Rinse ingredients in sink
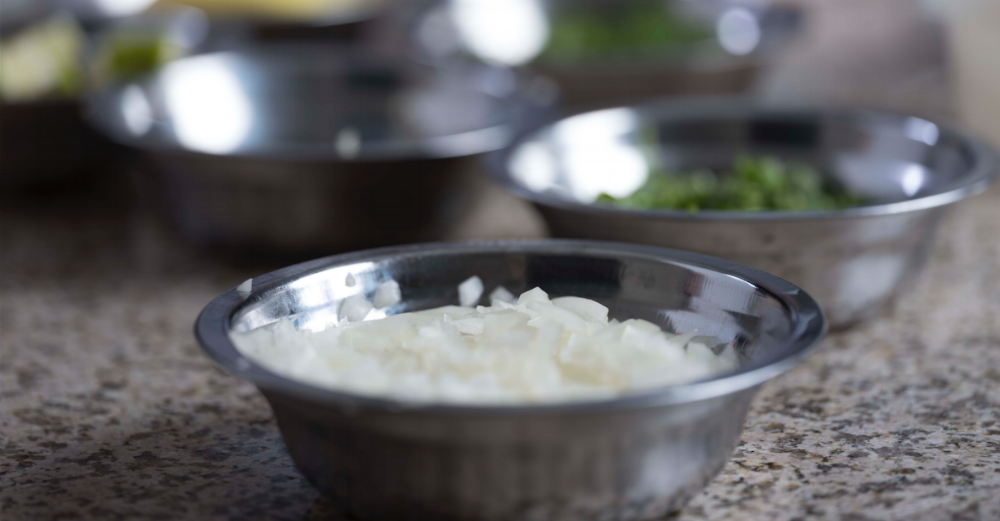
5. Chop ingredients into bowls and stage for seasoning
6. Consider combining chopped ingredients (if intermediate or advanced)
7. Clean up and put your equipment away
Let’s take a closer look:
1. Set up your prep station
Before you start cleaning or cutting anything, set up your prep station.

Ideally you would set up your prep station right next to your sink, but if not, you should have it be just a pivot away.
Your prep station checklist:
● One medium bowl for each main ingredients
● One small bowl for each seasonings
● One large bowl for refuse
● One trash can, lid off
● One recycling bin, lid off
● One chef’s knife
● One cutting board for produce
● One cutting board for meats
Ready to gear up? See the full EQUIPMENT CHECKLIST in the Appendix
2. Consider preheating your oven (400°f / 205°c)
If you might want to roast something then get the oven going now so it’s up to temperature by the time you get to cooking. You can always turn it off if you decide later that you don’t want to roast anything. ( You sure can’t go back in time to turn it on )
How do you decide if you want to roast something or not? And why preheat to 400°f / 205°c? We cover that in the COOKING SKILLS SECTION.
3. Start cooking your grains (if using grains)
Skip this step if grains are not part of your meal.
Because grains take so long to cook, they are an exception to Principle #3 (complete the steps of the routine in order) and you’ll want to start them at the beginning of your prep. That means you’ll be using your stovetop and minding your grains as they cook while completing the rest of the steps for all your other ingredients. Once you get the hang of it, it’s no big deal. But it does make things a bit more difficult. Damn you, grains!
4. Wash your vegetables and seasonings
Dump all your veggies in a bath in your sink and pull them out one by one as you chop them. Or run them under the faucet one by one as you go.
5. Chop ingredients into bowls and set aside in staging area

Two points to cover here.
1. The order in which to cut things
2. Where to stage the chopped ingredients
In the PREP SKILLS SECTION we cover the HOW of it all:
● How to use your chef’s knife
● What size to cut things
Believe it or not there is an order in which you should cut things:
Produce first

On a cutting board designated for produce. This is so that you don’t cross contaminate your veggies with meat juices.
Wipe your cutting board between each ingredient. Remember your ABC’s: Always Be Cleaning.
Next, cut your fresh seasonings and put each in its own small bowl and set aside.
Then, clean your produce cutting board and put it away. You are done with it for this cooking event. Clean it. Put it away. Done.
Meats next

On a cutting board designated for meats (non-porous), portion and cut your meat to the sizes you want and place in a bowl in your staging area.
As you cut your ingredients and get them into bowls, don’t let them crowd up your prep station area. Instead find another part of clear counter space and use that for your staging.

6. Clean up and put your equipment away
Before you move on to the next step - seasoning - it’s critical that you break down your prep station, clean and put away all your equipment.
The sink should be empty.
The counters should be clear and clean.
It should be like you walked into the kitchen and found that some magical little elf put these nice chopped up ingredients and seasoning out in bowls for you to make a meal with.
Now it’s time to have some fun...
STEP 4. SEASON

There are three steps to seasoning your ingredients:
1. Set up your seasoning station
2. Season your ingredients by eye, according to your seasoning strategy
3. Put your seasonings away
1. Set up your seasoning station
Pull out all the seasonings you might want to use. Grab them from cupboards, pantry and refrigerator door. Don’t start seasoning anything until you have all your seasonings out and displayed in a sort of semicircle.

Leave room for your mixing bowls.
This is your seasoning station - or what the French call your “mise en place” (pronounced “meez un plass”). Or “meez” for short. It means ‘everything in its place’.
Get this all set up before you start seasoning anything. You’ll see it’s so much faster and easier to season when you have all your options right before you at arm’s reach.
2. Season your ingredients
Place the bowls for your meal in front of you at the seasoning station.

Now it’s just a matter of executing your seasoning strategy, which we cover in the SEASONING SKILLS SECTION.
The key is to put all your seasoning on now. This means all of your oil, salt,pepper, onion, garlic, and any vinegar, citrus, sauces, herbs or spices. You’re not going to add any seasonings after this step (until you are very skilled).
That means:
● No oiling the pan (you are oiling the ingredients now)
● No tasting and adjusting as you cook (you had your chance!)
● No “blooming” your spices or creating layers of flavor (save that for your special occasion cooking)
This concept of putting all your seasoning on before you start cooking is the biggest departure from recipes in all of Kitchen Karate.
If you are a die-hard recipe follower you will have a lot of trouble sticking to this principle. You have been trained to oil your pans, bloom your spices, caramelize your onions, render your fats, etc.
And you’ve learned that cooking can be a damn tedious process because of all of that.
Sure, your dish might come out tasting a little bit better if you finesse the seasonings as you go. But it won’t be so much better that it was worth wreaking havoc on your kitchen and wasting a bunch of time.
If you don’t believe me, I challenge you to take a recipe you like and eliminate all the seasoning steps. Just take the seasonings listed in the recipe and dump them on the raw ingredients in a bowl, mix it up, and cook it down. You’ll find the meal come together much faster and with less hassle and less mess ...and the meal will taste nearly as good.
Remember, we are trying to make quick everyday meals, not dinner party fare.
All that said, when you get very skilled at no-recipe cooking, then yes, you can start adding some of the finesse back in. Essentially, at that point you will be creating recipes, not following them.
3. Put your seasonings away
Just as you put away all of your prep equipment and cleaned up before you moved onto the seasoning step, now you need to put away all of your seasonings and wipe down your counters again before you move onto the cooking step.
All that is left out are bowls of seasoned ingredients, sitting there on clean clear counters, just waiting to get cooked up.
Don’t start cooking with a bunch of seasonings taking up counter space. You’ll find yourself fighting with them as you cook, and spreading your mess around. It saps your energy and wastes your time.
Choose sanity. Stick to the ABC’s of cooking: Always Be Cleaning.
Now it’s time to fill your kitchen with the sounds and scents of cooking.
STEP 5. COOK

Let’s put some heat on the subject.
Here’s the order of events when putting your food to the flame:
1. Decide how to cook each ingredient and get out the related cooking equipment
2. Put things you want to roast in the oven
3. Cook your stovetop items
4. Take out your serving utensils
5. Mind your ABC’s: Always Be Cleaning
Let’s take a closer look at each step
1. Decide how to cook each ingredient and grab your cooking equipment.
We do a deep dive on the various cooking methods in the COOKING SKILLS SECTION.
For now, here is when you decide how to cook each item. And as you decide, grab the cooking tool you need.
At the end of this step all your cooking equipment should be out and ready.
2. Put things you want to roast in the oven
Your oven should be preheated to 400°f / 205°c . Adjust the temperature if needed.
Stick your roasting items in and set your timer.
See the COOKING SKILLS SECTION for guidance.
3. Cook your stovetop items
It’s now time to turn your attention to your stovetop items.
Your ingredients are already seasoned and oiled, so dump them in a frying pan and turn on the flame. No, you don’t need to heat the pans first, unless you want to.
Crank the heat all the way up until things get bubbling away, then decide if you want to turn down the heat.
Cook with as many burners and pans as you need to (or can fit) so that everything cooks at the same time.
Stand and stir until things are done cooking.
As that’s happening….
4. TAKE ouT your serving utensils
As things get finished cooking you need a place to put them.
● Take out your trivets/heat pads if you are planning to pull things from the oven.
● Take out your plates or serving platters for things you pull from your frying pans.
5. Mind Your ABC’s: Always Be Cleaning
There are always free moments while you are standing at the stove waiting for things to get cooked. Well don’t just stand there… CLEAN!
Clean the mixing bowls.
Clean the pans as you finish using them.
Wipe down the counters.
By the time you serve the meal, you want as little to clean after eating as possible.
STEP 6. SERVE (EAT AND LEARN)

The best step of all!
Finally it’s time to enjoy the fruits of your labor.
You basically have two options when serving a meal:
1. Plate the meals individually and serve
2. Put out platters and let people serve themselves
Both are good options. Just get the food on the table. Don’t make a big to-do about it.
Eat + Learn
While you are eating, evaluate your work in the previous steps. Here’s the checklist to run through:
● Not enough or too much of anything? Think of how to adjust your ingredient picking skills
● Things not cut up to your liking? Think of how to adjust your prep
● Taste underwhelming or overwhelming? Think of how to adjust your seasoning
● Anything underdone or overdone? Think of how to adjust your cooking.